
Building a closet with IKEA material and wood from the hardware store, that’s what we did. In this blog a step-by-step plan for your custom DIY Ikea Pax built-in hack. Long live the IKEAhack!
This blog is a translation of my original Dutch DIY blog. I got many questions from non-Dutch followers on Instagram so therefore this version. Unfortunately the rest of my website is in Dutch, sorry. Enjoy this blog and DIY-ing. And my apologies for the (hopefully little) language errors.
Step-by-step plan for your IKEA Pax Built-in Hack
This step-by-step plan is for walk-ins and built-ins. If you’re planning a built-in with doors follow all the steps below and see the extra tips at the end of this blog. In our house we build a walk-in and built-in.
Step 1: Measure the space & make a global plan
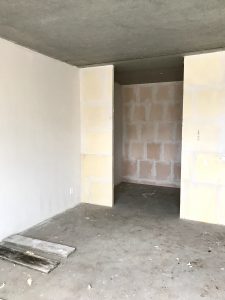
We had walls placed in our new house for a built-in closet in our bedroom. Decide which space you’re going to use, measure it and make a global plan.
PAX cabinets have standard sizes (100 cm, 75 cm or 50 cm) so that’s your base. The width is 58 cm so that’s your starting point when measuring.
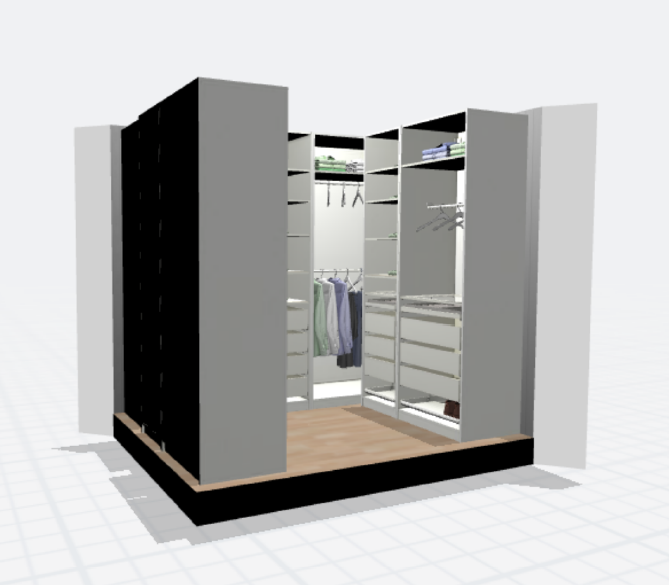
Step 2: Design your walk-in closet in the PAX planner
You can design your closet in the PAX planner. I love symmetry so I mirrored the sides. Of course you can decide for yourself what you like best. With the planner you immediately get a list of materials and an impression of the wardrobe.
The disadvantage of a fixed space (a room / placed walls) is that the elements of Ikea almost never fit exactly.
And that is exactly why this DIY Ikea Hack is brilliant.
Important: Create a design with only straight cabinets (no corner elements.) These are much more expensive and since you are going to build-in it’s not necessary.
Step 3: Order/ buy your cabinets
Order the cabinets and one extra cabinet as sawing material for the space in between the cabinets in the corner.
As you can see above. We put the cabinet against the small walls to have some extra space on the short side (the sides) and the long side. This creates space between cabinets 2 and 4 and the cabinets on the long side.
An extra advantage is that we can now better reach the clothes in the corner because there is more space.
Step 4: Arrange a carpenter or build it yourself
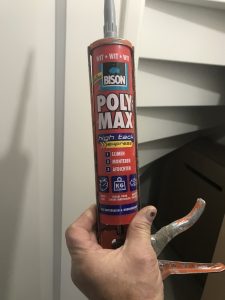
To create your own built-in you have to be a bit handy or know someone who is. You are going to build a frame. The IKEA cabinets will be put on “a base” and secured against a frame. With spruce wood you mount a frame, with glue/kit (see the kit below) and screws against the wall/ floor.
You will also put the extra pieces between the cabinets against this.
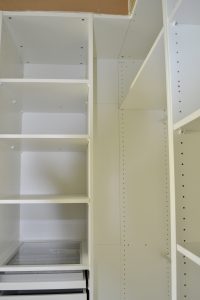
Below is an impression of what that looks like:
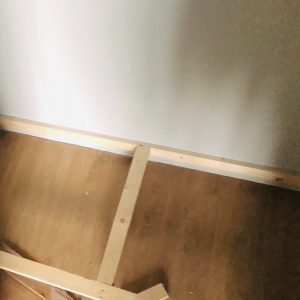
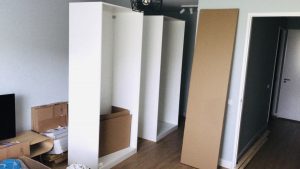
Assemble the PAX cabinets (only the conversion) and place them on the “base” and against the frame. Fasten them against the wall on the spruce base. The shelves and drawers are the last (after placing in / on the conversion) in the cabinet.
TIP: leave the socket (if you have one) free so you can always place and connect recessed lighting.
For the really organized people (not me) you immediately plan the light and include it in your design.
Measure the space you have left between the cabinets. Cut the pieces from the extra PAX cabinet you ordered. Secure it against your spruce base. Exactly between the PAX wardrobes so that it fits nicely. Of course, don’t forget the ceiling.
As you can see below, the material from the extra PAX was used to optimize the extra space. The boards (self-sawn to size) are stuck to the base of spruce wood with very strong sealant.
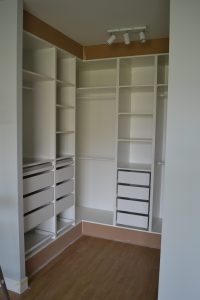
The base for your custom walk-in closet is in place! Yeah!
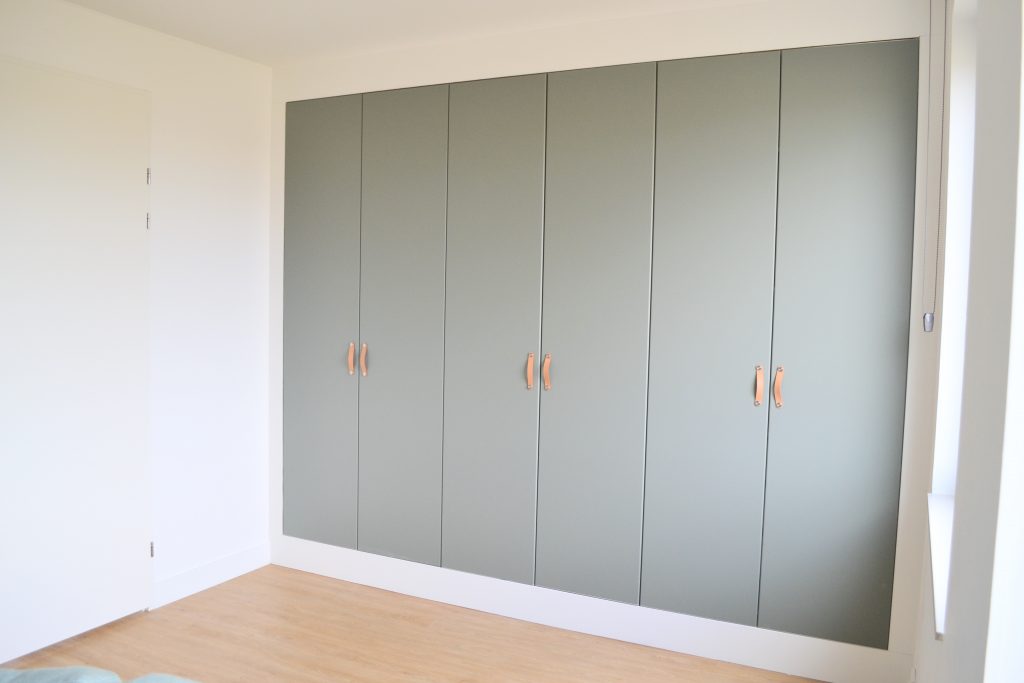
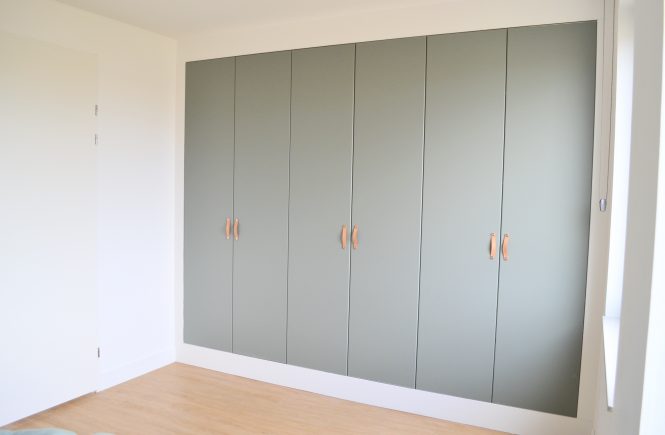
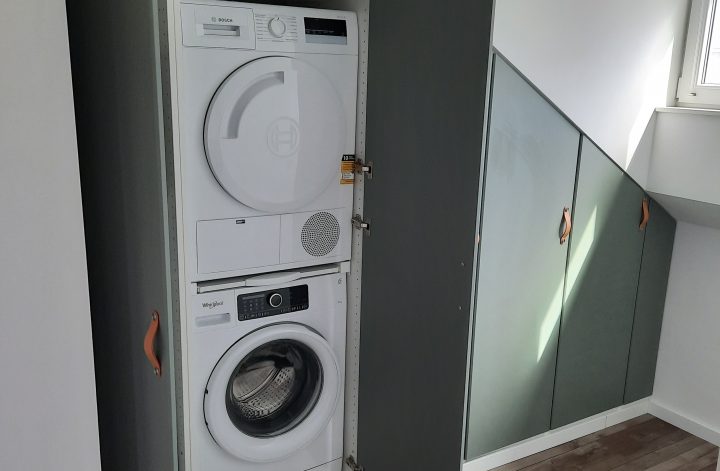
Step 6: Cove with MDF and finish the cabinet
Have MDF cut to size at the hardware store and place it against the top and bottom. Then finish the cabinet, drawers and shelves. Your custom built-in wardrobe is now almost ready.
Paint the MDF plates with a slightly shiny lacquer. We used a silk white from Flexa. This is about the color of the PAX cabinet.
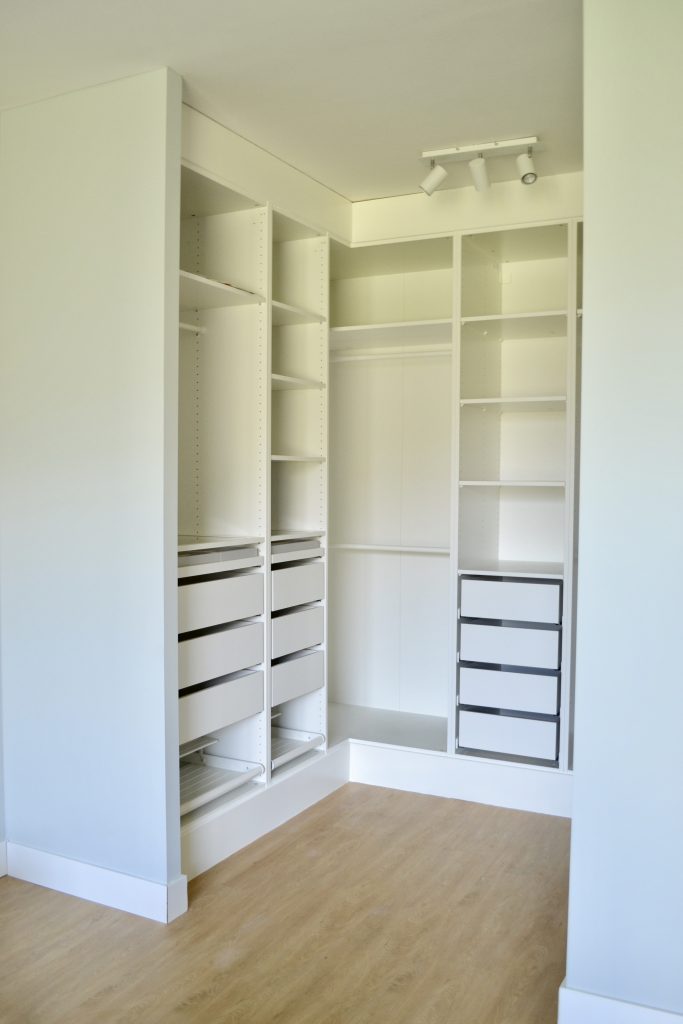
Step 6: Taaaadaa
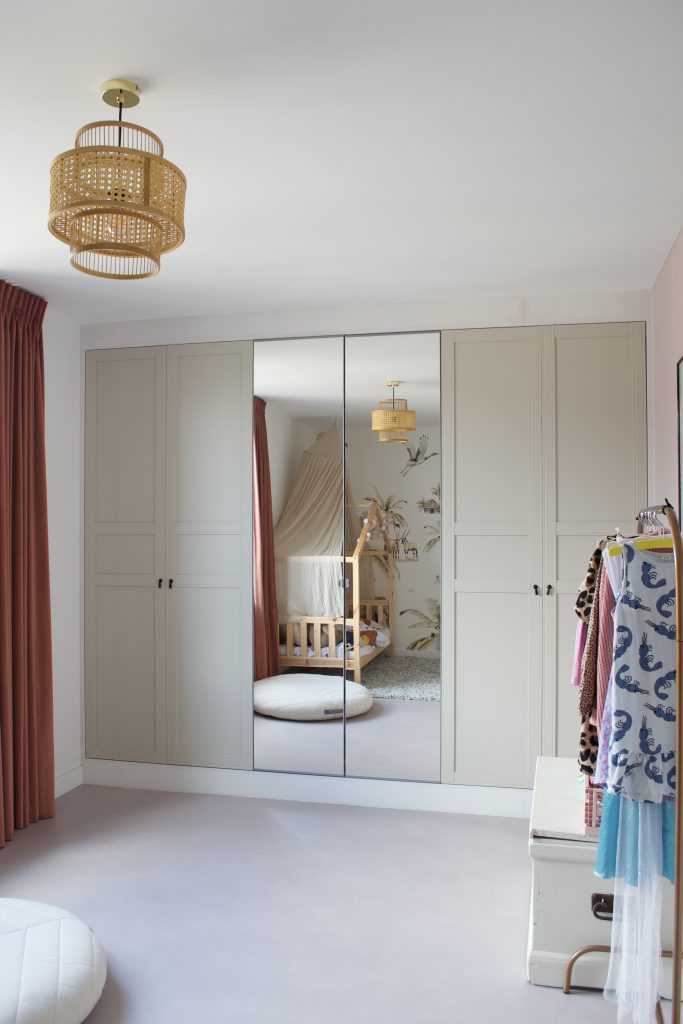
On the picture below you’ll see the end result for our walk-in. On my Instagram account you will find several cabinets that are built in this way.
What do you need for a custom built-in wardrobe?
Check out the overview below:
• Cabinet design PAX Ikea (made with the PAX wardrobe planner)
• Extra cabinet for sawing material
• Spruce wood
• Mdf
• Kit Poly Max
• Screws
• Lacquer paint for the cove
• Possibly. lighting
Extra tips for built-in with doors:
- As you can see at step 4 it’s smart to first put in the hinges if you’re building a cabinet with doors.
- With doors it’s really important to measure the MDF material for the cove correctly. Otherwise the doors with not open smoothly.
- For built-ins against straight walls you don’t need the extra cabinet for sawing material.
More DIY Ikea PAX Hack examples
Want to see more examples? Regularly I get pictures of DIY’er that used my blog and build their own built-in. In the Dutch blogs below you can see the result of these projects.

Reply and follow
Did you like (and used) this blog? Please reply below. Love to hear from you. And want to see more up-to-date examples? Follow me on Instagram of Pinterest.
8 comments
Super helpful! I was having such a hard time finding real, clear steps to do this. This is exactly what I was looking for. Thank you
Thanks! Lovely to hear.
How did you build in those corner pieces to hide the gaps? Did you use IKEA pax and trimmed off the other portion of the cabinet? Or is it mdf purchased at Home Depot or the like?
Hi Joyce, yes we bought one extra PAX cabinet to hide the gaps in between the other cabinets and use a trimmed version of this board. The fronts (above) are MDF. Good luck and curious to see the result. Kind regards, Mara
This is exactly what I was looking for. Thank you! Quick question, where did you get your closet doors?
Hi Yvonne,
Thank you so much! The doors are from IKEA as well. Type: Reinsvolle.
Kind regards, Mara
He, can you think along with me. I plan on doing the same, but on the floor, so no base. I plan to place the mdf not like you “touching” the top of the closet, but I want it covering the outside frame of the pax closets. So my ceiling board will be in front of the edges and 17,5mm extra, lower, so it will cover the top plate, idem with bottom and where two closets side side by side I plan on placing a 35mm mdf board on the edges so these are not visible. I also have no doors. Do you see any issues with this 🙂? I do know about the 1-2mm gap that I will need to fill because the vertical closet edges stick out a little bit in comparison to the top and bottom edge.
Hi Mike,
I don’t see any issues. It sounds like a good plan with a bespoke finish. Good luck!